
In a medium bowl, combine the sliced strawberries with 1/4 cup of sugar and the lemon juice.
Let the strawberries sit for about 15-20 minutes to macerate and release their juices.
2. Make the Ice Cream Base
In a blender or food processor, combine the macerated strawberries (with their juices), heavy cream, whole milk, remaining 3/4 cup of sugar, vanilla bean paste, and salt.
Blend until smooth, leaving some small strawberry pieces if desired for texture.
3. Chill the Mixture
Pour the mixture into a bowl and refrigerate for at least 2 hours, or until thoroughly chilled.
4. Churn the Ice Cream
Once chilled, pour the mixture into an ice cream maker and churn according to the manufacturer’s instructions until it reaches a soft-serve consistency.
Transfer the ice cream to an airtight container and freeze for at least 4 hours or until firm.
5. Make the Strawberry Syrup
In a small saucepan, combine the chopped strawberries, sugar, water, and lemon juice.
Cook over medium heat, stirring occasionally, until the mixture comes to a simmer and the strawberries break down, about 5-7 minutes.
Remove from heat and let it cool. Blend the syrup for a smoother consistency if desired.
6. Serve
Scoop the strawberry vanilla bean ice cream into bowls or cones and drizzle with the strawberry syrup.
Serving and Storage Tips
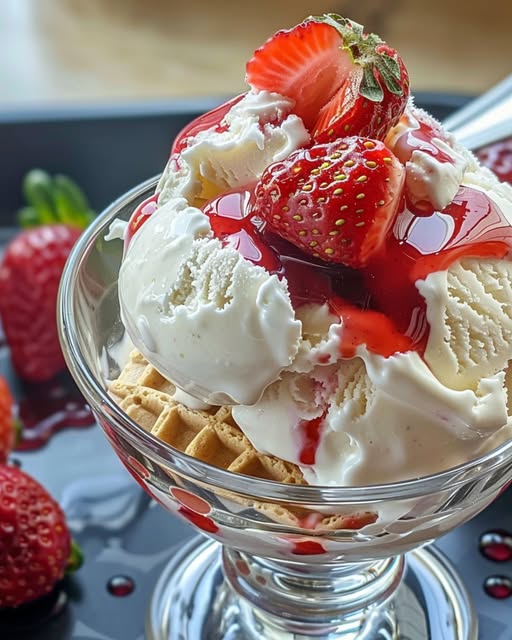
Strawberry Vanilla Bean Ice Cream with Strawberry Syrup
zobacz więcej na następnej stronie
Reklama

Yo Make również polubił
Easy Mini Cheesecakes
Hard-Boiled Egg Gratin with Béchamel Sauce – A Creamy, Savory Delight
Garlic Parmesan Chicken Pasta
Praliné Almonds: Easy and Irresistible!